Get children working together to create a giant classic piece of art. Use excel to break pictures into pieces, have kids draw and color those pieces, then add them together to make a complete grid art masterpiece.
Supplies for Grid Art
- A printer
- Excel
- An image
- Pencils
- Markers or Colored Pencils
How to break up a picture using Excel
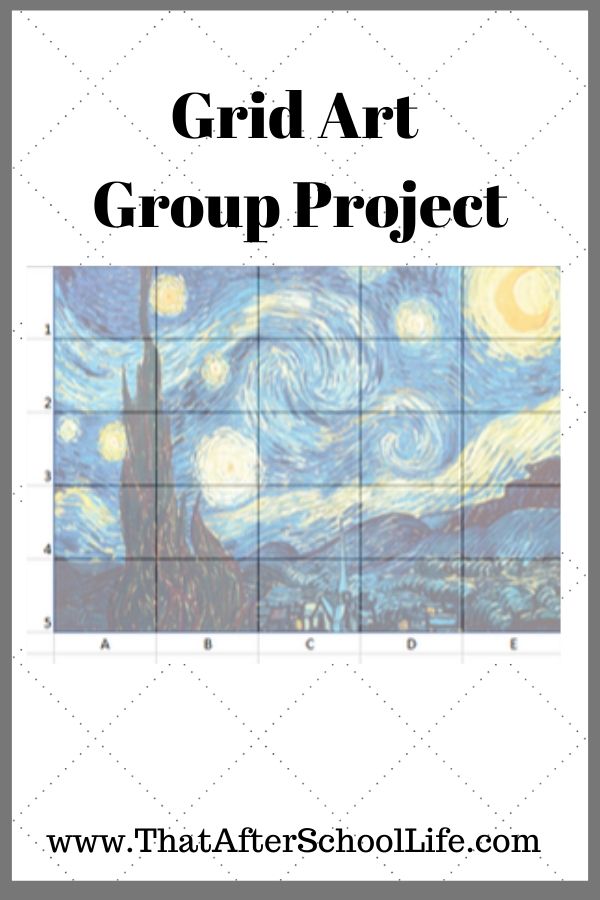
Choose a picture you want your class or group to recreate, make sure the picture difficulty is appropriate for your age group. The example here is Stary Night which would be suitable for older children. You can find these images free from pixabay.com
Open an excel doc
resize the cells so they are the ratio of a piece of paper. I set the width at 10 and the height at 40.
Then, go to Insert → Shapes
Pick a rectangle. Place the rectangle on the spreadsheet starting with the upper left corner in b1
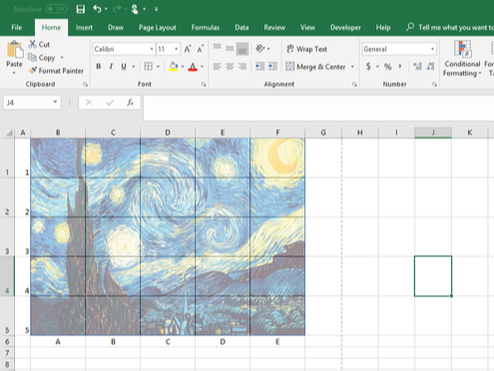
When you have the rectangle set left click and click on format shape. The format shape menu will appear on the right of the screen. On the fill page click picture or texture fill. Under picture source click insert, find the file for the picture you are recreating and click insert. Then, you will notice a transparency bar below the insert button. Move the transparency bar until to 50%.
You should now be able to see the grid lines of the spreadsheet through the photo. Manipulate the picture so you have the number of pieces you want. For example if the upper right corner of the rectangle is in b1 and the lower right corner is in e6. You will give you 20 pieces, move the lower left corner to create more or less.
Highlight the cells behind the photo, go to the home page and put a border on all cells.
Create your grid putting the letters vertical and the number horizontally. SO each piece will have a number & letter. Then print, you are now ready for the kids to make a masterpiece
How to Create the Art
Give one square to each child, have then really look at the square. Look at the colors used and the size of each brush stroke or line. Then give them a piece of paper and have them mark their grid square on the back (example: D3)
They will then use scaling to enlarge the square onto a larger piece of paper. Some squares are more challenging than others. Some children may need help drawing the shapes or designs in their square.
When all squares have been completed assemble the picture. Notice that some people paid close attention to details while others concentrated on the big picture. What else do you notice about the grid picture?
More Like This
If your group of kids enjoy creating Grid art they may enjoy making a classroom quilt. This simple craft activity asks kids to create a quilt square that represents them, then putting the squares together to create a community quilt.


Pingback: Classroom Quilt; A community building Project - That After School Life